Wednesday, January 30, 2013

Color choice for the Nimbus

Coral Red over Cornish Cream

Coral Red: RAL 3016 / RAL Hex: #B32821/ Nimbus chart Hex: #A11513 / RAL-RGB: 179-040-033 (http://www.ralcolor.com/ and http://53nimbus.blogspot.co.uk/2013/01/nimbus-color-chart.html

It was hard to find the cream color. We found something that was almost an exact match. at Stockwell Motor Accessories. The variance can be attributed to the different manufacturer.
Land Rover (Morris) 374 Cornish Cream - D. G.

These codes for Cornish Cream didn't help:
Cornish Cream: Dupont: 22, 246-5265 / Ditzler PPG: 80481 / Other code: N-37 (http://paintref.com/cgi-bin/colorcodedisplay.cgi?code=N-37&manuf=AMC&rows=50)

Monday, January 28, 2013

Cam shaft timing


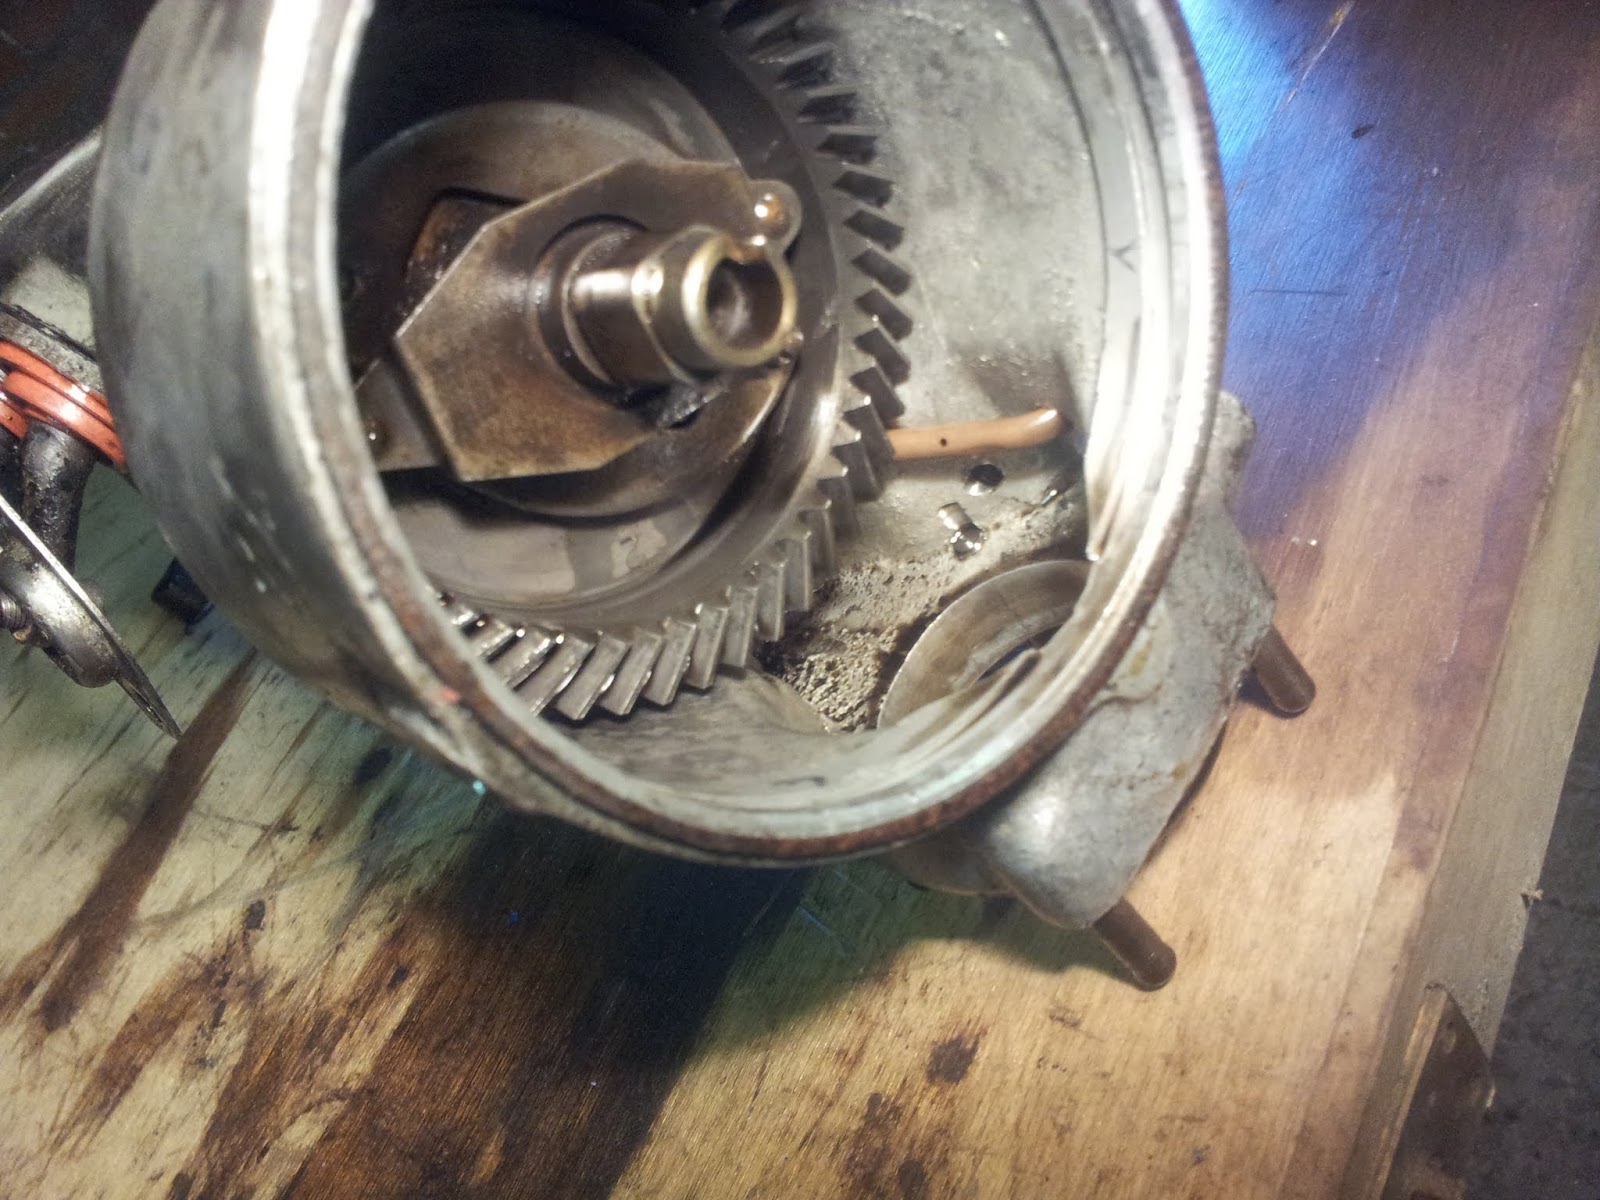
The red tooth indicates the cam shaft timing. It correlates with a + sign on the flywheel or swing wheel.
If you look closely on the red tooth, you will see that a corner is filed off.

When the plus on the flywheel rim is in the middle of the top hole of the swing wheel housing (where the mushromoid little cap is stuck down), the filed off tooth of the cam shaft wheel should be against a marking on the inside of the bell shaped part of the cam shaft housing The marking is a big minus-sign and it is opposite the oil return opening.


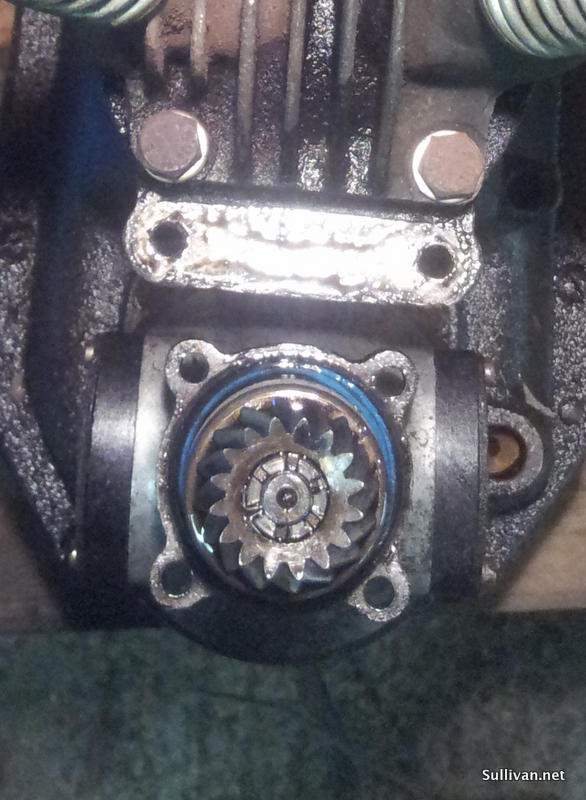
Now do inspect the dynamo CLOSELY. Its top wheel does ALSO have a filed off tooth. There should be a faint marking on the dynamo neck. The filed off tooth should be at that marking when assembling. If the marking is not there, we have a bit of a problem now... The reason why the marking is there is to ensure that the wheels have the same engagement. There is no 'hunting tooth' system on the Nimbus so it goes in the same engagement. If you change that engagement, you will get some howling from primarily the bottom and top engagement of the dynamo.


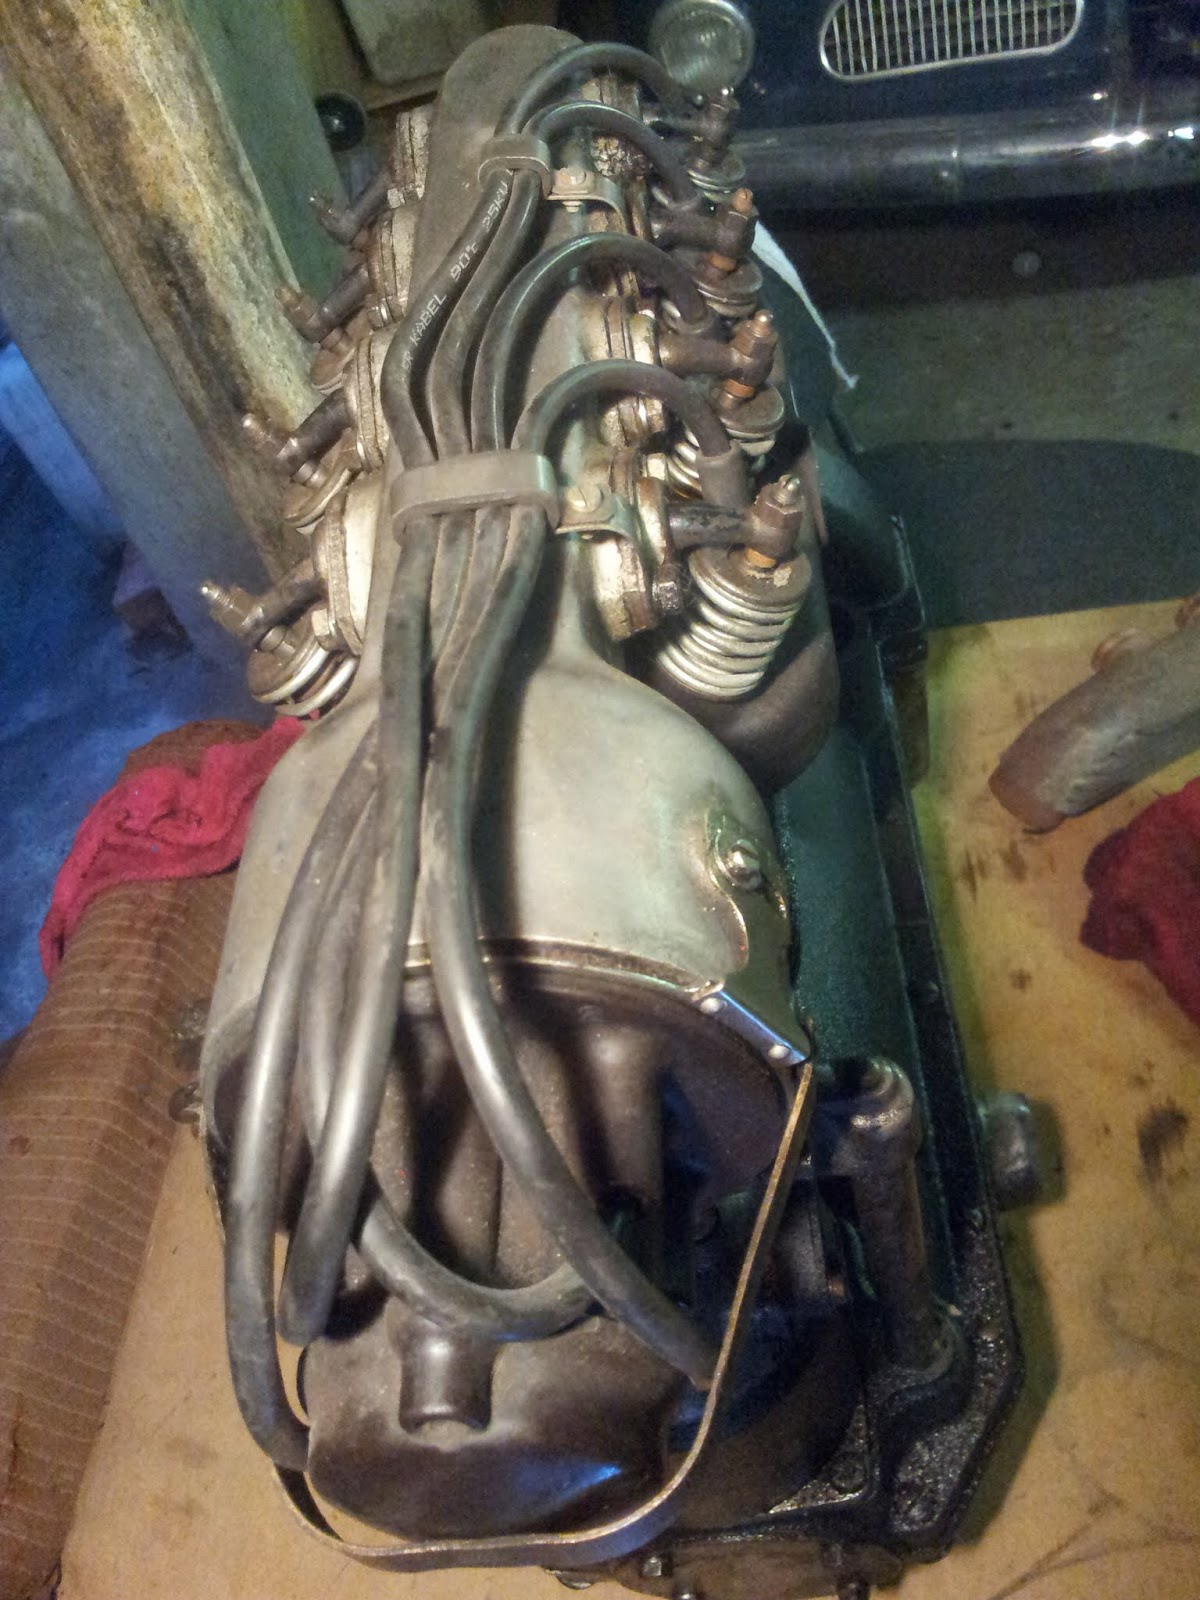
Engine head, valves, and springs

To remove the springs, you get a valve spring compressor tool from an automotive store. Make ABSOLUTELY SURE that you mark the valves and their components. Each valve should go back into its original position. So number 1 exhaust has the same valve. Number 2 etc. If you mix them around,  you will have a tough task in tightening the valves again.

Here we have the head and springs:


The cylinders look smooth.

I am not sure about the discolouration of this one:


The head gasket is not symmetrical since the barrels are not either. There are four different ways to mount the head gasket, but only one is correct. If you examine a new head gasket CLOSELY you will see a punch number 1 or the letter I by one of the cylinder holes. That stamped marking should be facing up and be by the last cylinder. 
If you can look at the punch mark on the gasket as a minus sign and it should be as close to the minus sign on the battery as possible. I.e. at the rear cylinder, facing up /(=to the left).

The valves:


I used a valve spring compressor to remove the springs. This is how they go back together. (top is on the right)


I numbered the valve stems so they can go back in the same place:


Rocker arms & distributor (top of engine)

This piece is much more simple than I expected. Taking it apart was quick and easy.

The cam shaft housing is prone to have parts of the rear foot broken off.
To avoid that, remove the two rear screws first and the front ones last.
When mounting it in place again, fasten the FRONT screws first and the rear ones last.


Note the red mark on the tooth. This will have to be lined up correctly when I put it back together. I am sure there will be another similar mark behind the round plate on the front of the block/sump.


The gasket between the distributor and the dynamo was bad/non existant. That would cause some leaking.


Several of the gaskets were bad with partly explained some of the leaking.


Wednesday, January 16, 2013

Removing forks from frame


Removing the forks from the frame (from Lars):


"The nuts are counter nuts and there should be a washer with a tab that goes into the machined slot along the threads.

The top nut is just a nut, but the bottom nut is a bearing race for the steering column bearing.
Once that is out, the whole steering column is lose and so are both the balls of the top bearing and the balls of the bottom bearing. There are 12 in each bearing and they are NOT easy to get back in place. However, this is something that has to be done now and then since, like all bearings, they need lubrication. Famous GOTCHA is to put 13 balls in either bearing since it looks as if one is missing. This will make the bike go sailing all over the place..

To remove: Use a VERY wide wrench that fits the nut. Unscrew nut number 1, remove washer.
Prop up the fork (wheel out) so that it can be lowered gently, unscrew nut number 2. Apply a strong magnet to fish out the top balls, with the fork pressed upwards.

VERY gradually lower the column and fish out the balls with the strong magnet as the column comes down.

Do inspect the inside of the frame part of the steering column. More often then not, you can salvage lost balls from inside there and you need them...

When replacing the balls, use VERY sticky and firm grease and glue the balls in place in the bottom race. Press fork up and column in place and secure so that the steering column is centered. Glue the top balls in place with that heavy grease and replace the top race. Make sure that there is no play but that the races do not bind. Put the washer in place and tighten GOOD with the top nut."

To loosen the nuts I needed a 46mm wrench and a pip to extend the reach with 2 people holding down the frame.




Tuesday, January 8, 2013

Another color choice?


If I want to keep mine for original, I should keep it to American Red, Black, gray, green (don't want green), or yellow.

I must find the color number for American Red to see if it will go with cream.
If not, I could go with gray with deep red wheels/hubs. That is a beautiful combination. 

Painting the wheels red is not original, but it will look fantastic. Here is an example:


Mine off course would be more original. This one has been heavily modified. The only deviation from original on mine would be the wheels and the other parts I deem to carry the red.

Year/color chart

I translated a bit of it:


According to this, the only red available in 1953 was American Red.
Other color options for 1953:

American Red

Black

Mal Green - I am not sure what green this is

Dansk Postgul Yellow - used by the post office

Civilforsvarsgrå (civil force gray) - mine was this color

Elektronemaille- dull? - I don't know what color this is


Monday, January 7, 2013

Nimbus Color Chart

Here is a Nimbus color chart (borrowed from http://www.nimbussen.dk/node/27)
Rød gruppeRAL FarveNimbusfarveRALHEXRGBHSL
RødlillaRød, ny30046c1b2a108274224715368
VinrødRød, gammel3005581e2988304124712559
KoralrødRød, forslag.13016a115131612119020190
Gul GruppeFarveNimbus farveRALHEXRGBHSL
ElfenbenElfenbensgul1014dfcea122320616130125192
GråbeigeLavendelgrå1019a6937b1661471232350145
GinstergelbDansk Postgul1032eaa400234164030255117
Grøn gruppeFarveNimbusfarveRALHEXRGBHSL
BlasgrønGrøn,vissen602187a1801351611287638145
Grå-grønMilitær,gammel7009585e55889485711390
KiefergrønMilitær, ny60282e554b4685751177666
BlågrønGrøn, tone.160040045470697112825536
GråolivenGrøn, tone.260063b3d33696151502356
Sort/blå/grå gruppeFarveNimbusfarveRALHEXRGBHSL
TrafikgråCivilforsvarsgrå70429298991461521531338150
GråaluminiumPolychromatgrå9007736b6b1151071072559111
EnzianblauBlå, ny501000427F06612714725564
StålblåTivoliblå50111a274026396415610845
SortSort900500000000025500

Shaft Drive

My shaft drive is looking pretty raw.

The angle of the outer ring on the end look a bit skewed. I am not sure is this will be a problem.


Oil leaks

When I go very fast (100 Km/hr) oil squirts out the front onto my right boot. When I dive normally, oil leaks out slowly everywhere.

I thought it might be the head gasket.
The Dynamo vent hole/dynamo gasket ring is a very good possibility for the leak at hight speeds.

From Lars Persson, "Believe it or not, but the oil does not come from the head gasket. There is no oil channels in conjunction with it. Usually the oil comes from the dynamo vent hole, dynamo gasket ring or the cam shaft housing and is blown down into the head area. To ensure that the head gasket is tight, take a compression test. When a head gasket leaks, it is usually between 3:rd and 4:th cylinder. Observe that dry cylinder walls can cause a false reading and so could leaky valves.  If a gasket start to leak, it will VERY soon develop a channel from the cylinder to the outside or to the next cylinder with drastically low performance and very uneven running."

Front wheel spoke angle/bend


I was convinced my front spokes were not correct. They look like they are going to the wrong hole in the center. You can see the bend at the outside. I am told this is in fact correct.

According to Lars Persson, "Initially, the front wheel had straight spokes, but this was abandoned for the ones with knees since the latter are stronger."

Here is an example photo of another Nimbus:


Shifting gears on a Nimbus

Thanks to Lars Persson for this detailed description. 


The NImbus gearbox is a VERY basic gearbox. You have to SLOT the 2:nd gear into actual cog engagement. It does not get more unsynchronized than that. You should not put the bike in gear. You should CARESS it into gear. Take time.

To shift up is easier than to shift down, but!


Shifting up : pull clutch, let revs fall while maintaining a light pressure on the shift pedal. The gear falls into place. If you press hard or try to shift like a modern bike, shifting will not happen.


Shifting down: Pull clutch. Rev UP. As revs falls, sneak the gear in.


When you are REALLY good at this, you will only need clutch when starting! The veteran rider knows revolutions and speeds and can shift soundlessly without using the clutch at all.


BTW! Never stand idling with the bike in gear and the clutch pulled! This will wear out the main bearings faster than one can think possible!


If the spring for the ball is weak, the bike typically falls out of gear under load.


Proper clutch adjustment: The nuts holding the clutch bar should be as far in as possible, without the disengagement rod touching the arm. Then adjust cable so you get a comfortable clutch hande disengagement angle, wihtout the disengagement arm touching the disengagement rod.


The dogs of the wheels in the gearbox might wear down, but refurbished wheels can be bought over disk. It would be considerably more expensive to get a four speeder.

Sunday, January 6, 2013

Diagrams

I borrowed the diagrams from the Motorcycle Club Nimbus in Denmark.
http://www.mcnimbus.dk/reservedele/reservedele/index.htm

Thanks!

2nd gear not working

My 2nd gear has been unusable since the end of summer.

We took apart the gearbox yesterday and inspected all the gears. The Nimbus gearbox is different than the other gear boxes we are used to.
From what we can guess, the center notch is 2nd gear. When in 2nd gear, the the 2nd gear is no touching the 1st or 3rd gears. If it cannot stay in 2nd gear, then it must be the ball in the 2nd gear notch. The spring behind it must not be strong enough to keep it in gear. I need stronger spring?


I also wonder how much, if any the gearbox requires. With no drain plug, you would think it is a dry gearbox. I cannot find information on this. If it is a dry gearbox, then perhaps it cannot stay in 2nd because there was oil in the gearbox?

I need a proper manual in English!

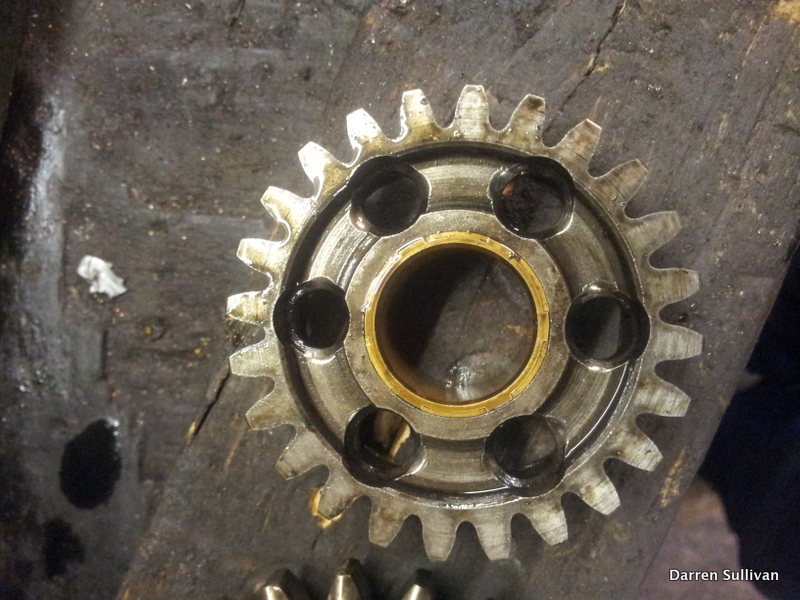
There is wear on the 3rd gear. You can see the rounding around the holes. They are becoming a bit oval. Since 1st and 3rd are strong, I don't think this is a problem.


You can also see (in the top image) that the tips of the 2nd gear that engage into the 3rd gear are slightly rounded around the top corners. Not sure if this will cause a problem.

I have many questions for the my contact in Denmark.


4 speed gear box?

A 4 speed gear box has been developed. I heard it will cost about €750. That is a lot of extra money.
If I can get my 2nd gear working again, then I should be happy with that.

Here is the link to the 4 speed gear box: http://www.allitnil.df.lth.se/nimbus/4trin/ebgear.htm

New color scheme

The last owner of my Nimbus spray painted it and did it poorly. I have wanted to respray the bike for some time now.

I thought I would make it dark Nimbus blue. It is a lovely color. However, since studying the different color combinations found on the web, the one I like the most is red over cream. This has nothing to do with my Morris Minor which is cream with a red hood. I think that the combination is beautiful.

Here is a breakdown of the individual pieces and what color I plan to make them.

Cream (powder coat): 
* Wheels, hubs, spokes
* Seat racks
* Drive shaft
* Tank underside
* Feet pegs
* Bottom 1/2 of forks

Red (powder coat):
* Frame
* Headlamp
* Handle bars
* Tank top side
* Fenders

Black: 
* Kick stand (powder coat)
* Headlamp ring (paint)
* Engine block - shiny?

Chrome/chrome like:
* Rear seat handlebar (powder coat???)
* Nuts & bolts
* Brakes levers (powder coat)
* Gear Shift (powder coat)

Polished Aluminium:
* Head
* Tail light
* Gearbox
* Sump (powder coat???)

I used the following Nimbus as reference. This I think is a 1936. My 1953 has slightly different features (front fender, seat rubber suspension, and no gear shift by the seat. Otherwise it is almost identical.